Create a Dynamic Block with block.json (Beginner-Friendly)
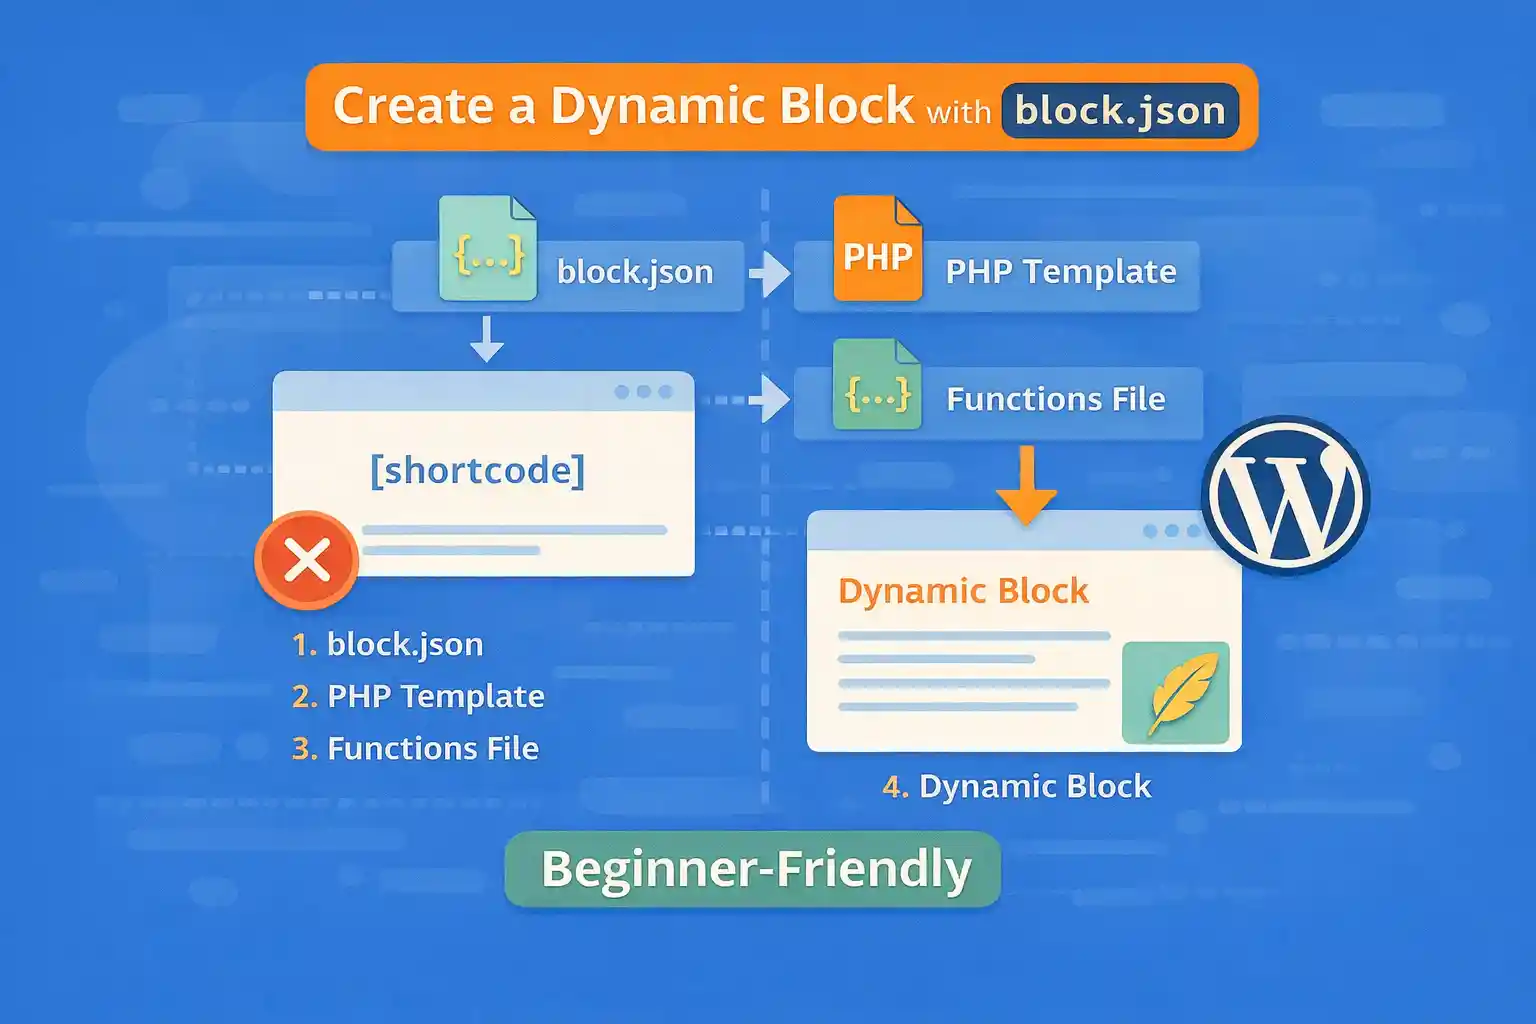
Modern WordPress blocks can be registered using block.json, which makes block development cleaner and more maintainable. If you want a block that outputs dynamic content from PHP (instead of saving HTML into post content), you’ll build a dynamic block.
This beginner-friendly guide shows how to create a dynamic block using block.json, register it in PHP, and render output with a render_callback.
What Is a Dynamic Block?
A dynamic block is rendered on the server every time the page loads. Unlike static blocks, it does not store final HTML in the editor content.
Dynamic blocks are ideal for:
- Latest posts blocks
- Related posts blocks
- Logged-in / role-based content
- Blocks that depend on settings or live data
Project Structure (Minimal)
You can place your block inside a custom plugin. Here’s a simple structure:
my-dynamic-block/
  my-dynamic-block.php
  build/
    my-block/
      block.json
      index.js
      editor.css
      style.css
The build/ folder is commonly used when bundling with build tools, but the concept is the same even if you work without a bundler.
Step 1: Create block.json
Create build/my-block/block.json:
{
  "$schema": "https://schemas.wp.org/trunk/block.json",
  "apiVersion": 2,
  "name": "wpcodetips/latest-posts-dynamic",
  "title": "Latest Posts (Dynamic)",
  "category": "widgets",
  "icon": "list-view",
  "description": "Displays your latest posts dynamically.",
  "supports": {
    "html": false
  },
  "attributes": {
    "postsToShow": {
      "type": "number",
      "default": 5
    }
  },
  "editorScript": "file:./index.js",
  "editorStyle": "file:./editor.css",
  "style": "file:./style.css"
}
Key idea: block.json declares your block metadata and assets.
Step 2: Add the Block Editor Script (index.js)
Create build/my-block/index.js:
import { __ } from '@wordpress/i18n';
import { useBlockProps } from '@wordpress/block-editor';
import { InspectorControls } from '@wordpress/block-editor';
import { PanelBody, RangeControl } from '@wordpress/components';

export default function Edit({ attributes, setAttributes }) {
  const { postsToShow } = attributes;

  return (
    <>
      <InspectorControls>
        <PanelBody title={__('Settings', 'wpcodetips')}>
          <RangeControl
            label={__('Number of posts', 'wpcodetips')}
            value={postsToShow}
            onChange={(value) => setAttributes({ postsToShow: value })}
            min={1}
            max={20}
          />
        </PanelBody>
      </InspectorControls>

      <div {...useBlockProps()}>
        <p>
          {__('This block is rendered dynamically on the front end.', 'wpcodetips')}
        </p>
        <p>
          {__('Posts to show:', 'wpcodetips')} {postsToShow}
        </p>
      </div>
    </>
  );
}
This editor UI lets users set the number of posts, but the front-end output will be generated by PHP.
Step 3: Add Basic CSS (Optional)
Create build/my-block/style.css:
.wp-block-wpcodetips-latest-posts-dynamic {
  padding: 16px;
  border: 1px solid #ddd;
}
Create build/my-block/editor.css:
.wp-block-wpcodetips-latest-posts-dynamic {
  background: #fff;
}
Step 4: Register the Block in PHP
Create a plugin file my-dynamic-block.php:
<?php
/**
 * Plugin Name: My Dynamic Block (Example)
 * Description: A beginner-friendly example of a dynamic block using block.json.
 * Version: 1.0.0
 */

if ( ! defined( 'ABSPATH' ) ) {
  exit;
}

add_action( 'init', function() {

  register_block_type(
    __DIR__ . '/build/my-block',
    array(
      'render_callback' => 'wpcodetips_render_latest_posts_dynamic',
    )
  );

} );

function wpcodetips_render_latest_posts_dynamic( $attributes, $content, $block ) {

  $posts_to_show = isset( $attributes['postsToShow'] ) ? (int) $attributes['postsToShow'] : 5;
  if ( $posts_to_show < 1 ) {
    $posts_to_show = 1;
  }
  if ( $posts_to_show > 20 ) {
    $posts_to_show = 20;
  }

  $q = new WP_Query( array(
    'post_type'           => 'post',
    'posts_per_page'      => $posts_to_show,
    'no_found_rows'       => true,
    'ignore_sticky_posts' => true,
  ) );

  if ( ! $q->have_posts() ) {
    return '<p>No posts found.</p>';
  }

  $html  = '<div class="wp-block-wpcodetips-latest-posts-dynamic">';
  $html .= '<ul>';

  while ( $q->have_posts() ) {
    $q->the_post();

    $html .= '<li>';
    $html .= '<a href="' . esc_url( get_permalink() ) . '">' . esc_html( get_the_title() ) . '</a>';
    $html .= '</li>';
  }

  wp_reset_postdata();

  $html .= '</ul>';
  $html .= '</div>';

  return $html;
}
What this does:
- Registers the block using
block.json - Uses
render_callbackto generate HTML on the front end - Reads block attributes (like
postsToShow) from the editor
Step 5: Use the Block in the Editor
After activating the plugin:
- Open the block editor
- Search for Latest Posts (Dynamic)
- Add it to a post or page
- Adjust the “Number of posts” in the sidebar settings
The editor preview is a placeholder, but the front end will show the real post list.
Common Beginner Mistakes
Forgetting to run build tools
If you use a build system (like @wordpress/scripts), you need to compile JS into build/. If you are not using build tools, your file paths must point to real files.
Saving HTML in the block content accidentally
Dynamic blocks should render from PHP. The saved content should be minimal (often empty or comment-only).
Not sanitizing output
Always sanitize URLs and titles with esc_url() and esc_html().
Simple Upgrade Ideas
- Filter by category or tag (add an attribute)
- Show date/excerpt (still rendered in PHP)
- Add caching with transients for performance
- Allow selecting post type (post vs CPT)
Conclusion
Dynamic blocks are a modern, maintainable alternative to shortcodes for many use cases. By registering a block with block.json and rendering output via PHP, you get a better editor experience, cleaner front-end output, and a more scalable foundation for custom features.
Key takeaway:
Use block.json for metadata and assets, and use render_callback when content should be generated dynamically.
🎨 Want to learn more? Visit our WordPress Customization Hub for tips and advanced techniques.